

Best Solar Street Light: Top Choice for Sustainable Outdoor Lighting
2026-09-13
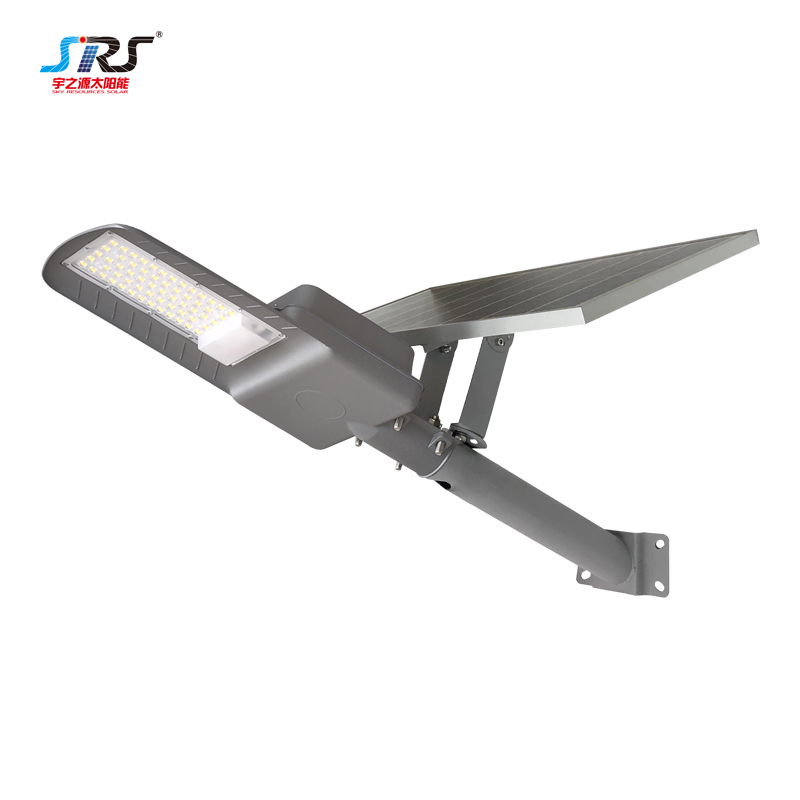
Solar street lights have been around for years, but most of what's on the market still feels like a gamble: weak panels, short-lived batteries, and housings that fade after one season. That's why "best solar street light" lists often fall flat. SRS takes a different route, engineering lights that actually earn a permanent spot on your street or property. If you're serious about sustainable outdoor lighting that won't let you down after a storm, here's what sets the top choice apart.
Why Solar Street Lights Beat Grid-Tied Fixtures in Real Neighborhoods
In established neighborhoods, retrofitting grid-tied street lights often means tearing up sidewalks or driveways to run new conduit, which turns a simple lighting upgrade into a multi-week construction project. Solar fixtures sidestep that entirely. There’s no trenching, no patching, and no need to coordinate with utility crews. For residents, that means the streets stay walkable and the project wraps up in a couple of days instead of stretching across a season.
Reliability tells an even clearer story. When a storm knocks out overhead lines, grid-tied lights go dark exactly when people need to navigate fallen branches and flooded curbs. Solar street lights with battery storage keep pooling light through the outage, which matters more in real neighborhoods than any spec sheet can capture. They also avoid the common budget trap of paying for underground cable repairs every time a tree root or freeze shifts the soil.
Over a decade, the math often surprises people. The upfront price of a solar unit can be higher, but once you subtract trenching, metering fees, and ongoing electricity charges, the gap closes quickly. Many installations end up paying for themselves through avoided utility bills alone, and neighborhoods keep the lights on without asking the local power company for permission.
How to Read Solar Panel and Battery Specs Without the Marketing Hype
Most panels are sold on their STC wattage—a lab number baked at 25°C with a blast of 1,000 watts per square metre. That rarely matches a rooftop in August. Look instead for the NOCT or NMOT rating, which reflects closer-to-real conditions: warmer panel, some airflow, 800 W/m². A 400 W STC panel might only push 290 W under NOCT, and that’s before system losses. Check the temperature coefficient too. A panel losing 0.25% per degree above 25°C sounds tiny, but on a 60°C roof that’s nearly 9% gone before a single wire is connected.
Battery specs are just as slippery. “10-year warranty” often means 10 years or a certain cycle count, whichever comes first, and the cycle count assumes you never drain below 80% depth of discharge at a mild 25°C. Run it hotter or deeper and the capacity fades faster than the datasheet implies. Ask for the usable capacity, not the nominal one—many lithium packs lock away 10–20% to protect the cells. If a 10 kWh battery only lets you touch 8 kWh, your backup math changes instantly.
A better habit is to build your own derating sheet. Take the NOCT wattage, subtract the temperature loss for your local summer highs, then knock off 10–15% for inverter and wiring inefficiencies. For batteries, halve the advertised cycle life if you plan to cycle daily in an uninsulated garage. This won’t give you a pretty brochure number, but it’s the number you’ll actually live with. And when the salesperson starts talking about “peak sun hours,” pull out your own shading map—real roofs don’t care about averages.
The Overlooked Role of Motion Sensors and Dimming Schedules
Most lighting discussions stop at wattage and color temperature, but the way lights respond to presence and time often matters more for both comfort and energy use. Motion sensors, when tuned correctly, eliminate the need to remember switches in high-traffic areas like hallways or storage rooms. The trick is adjusting the timeout—too short and you’re waving your arms mid-task; too long and the savings vanish. A well-placed sensor with a 5–10 minute delay feels almost invisible, while cutting unnecessary runtime by a noticeable margin.
Dimming schedules tackle a different problem: spaces that need light at certain hours but not at full brightness. Think of an office that empties after 6 p.m. but still needs security lighting, or a retail floor that shifts from task-level illumination during setup to ambient glow after closing. Instead of a binary on/off, a schedule can ramp down to 30% for a few hours, then drop to 10% overnight. This avoids the harsh jump of full darkness and keeps a baseline of safety without paying for unused brightness.
The real payoff comes when sensors and schedules are layered. A schedule might set the overall scene for the day, while occupancy sensors handle real-time adjustments within that window. For example, a conference room could sit at 20% when empty during work hours, jump to 80% the moment someone walks in, and then fade back after they leave. This combination sidesteps the common failure modes of either approach alone—schedules ignoring sudden occupancy, sensors fighting a fixed brightness level. The result feels less like automation and more like the room simply paying attention.
Weatherproofing That Survives Coastal Humidity and Desert Heat
Coastal humidity works like a slow abrasive on ordinary seals and coatings. Salt-laden fog creeps into micro-cracks, accelerates corrosion on metal flashings, and feeds mildew behind siding. A weatherproofing approach that ignores this will look fine for a year or two, then fail suddenly at the first tropical storm. The fix starts with breathable membranes that let trapped vapor escape without opening the envelope to wind-driven rain. Choose stainless or marine-grade aluminum fasteners, and pair them with elastomeric joint sealants that stay flexible after hundreds of wet-dry cycles.
Desert heat presents the opposite challenge: relentless UV radiation and thermal swings that can crack rigid barriers within a single summer. Here, the priority shifts to reflective roof coatings with high solar reflectance index, and to cladding systems that allow for expansion without buckling. Insulated concrete forms or rammed earth walls with lime-based plasters handle the daily bake-and-freeze better than thin synthetic veneers. One often overlooked detail is the junction between window frames and stucco—use a backer rod and a UV-stable polyurethane sealant, not acrylic caulk, or the sun will turn it into brittle crumbs by October.
For projects that straddle both climates—say, a coastal town that sees 110°F heat waves in August—the spec needs to be deliberately redundant. Install a rainscreen gap behind the primary cladding to handle humidity, then line that cavity with a radiant barrier to cut heat gain. Specify zinc-aluminum alloy coated steel for any exposed brackets, as it shrugs off salt spray and shrugs off temperature spikes. Test mock-ups for twelve months before committing: leave sample panels on the actual site through one wet season and one scorching summer. The materials that survive both without staining, warping, or losing adhesion are the only ones worth writing into the final contract.
Installation Truths Most Buyers Discover Too Late
You measure the doorway three times, double-check the clearance, and still end up with a unit that needs to be tilted at an angle that scrapes the ceiling. Many buyers only realize after the box is opened that the promised "easy install" assumes walls are perfectly plumb, studs are exactly where expected, and the floor is level enough to ignore. In real homes, older frames have settled into subtle bows, electrical boxes sit a half-inch off-center, and the gap between drywall and appliance can be tighter than the spec sheet admits. None of this shows up in the polished product photos or the quick-start guide.
The second truth is about time. What the manual calls a two-person, ninety-minute job often stretches into an afternoon of shimming, re-drilling, and hunting for a missing bracket that the factory forgot to pack. Buyers discover too late that rental properties with unusual cabinet depths or conduit running behind the wall will demand custom spacers or a completely different mounting approach. The frustration isn’t really about the physical labor; it’s the quiet realization that the "universal fit" promise quietly assumes a modern, square-walled home built in the last decade—and most living spaces aren’t that.
Finally, there’s the hindsight about inverters and compressors. Some buyers postpone installation until a weekend, only to learn that the unit needs to sit perfectly level not just left-to-right but also front-to-back, or the condensate line will back up. Others uncover that the power cord is too short for the nearest outlet, and running an extension cord voids the warranty. These details aren’t hidden in the fine print; they’re simply not foregrounded anywhere. By the time the unit is mounted and humming, the buyer has become an accidental expert in wall anchors, vibration pads, and the art of ignoring a slight tilt that only they can see.
The Ripple Effect on Safety, Curb Appeal, and Power Bills
Trimming back the massive oak that's been swallowing your roofline sets off a ripple effect you'll feel in three quiet ways. The most obvious is safety: removing dead or overhanging limbs means a heavy branch is far less likely to crash onto your car or walkway during the next storm. That same pruning also opens up your front yard to more sunlight, brightening the facade and making the house look cleaner and more inviting from the street—a boost to curb appeal without spending a dime on paint. And if you've got solar panels, or simply want to take advantage of passive winter heating, a less-shaded roofline can shave a few dollars off your power bill, since panels work harder and windows catch more direct sun.
Replacing single-pane windows with modern double-glazed units works the same kind of magic. The safety angle is easy to miss: newer frames often include reinforced locking mechanisms and tempered glass that make a break-in noticeably harder, turning a weak point into a barrier. Visually, the clean lines and uniform glass—free of old aluminum frames or fogged seals—give your home a crisp, updated look that catches the eye of anyone walking by. But the real ripple shows up on your energy statement, because double glazing traps heat in winter and blocks it in summer, letting your HVAC system run less often and your monthly costs drop without you touching the thermostat.
Even something as simple as swapping a hollow-core front door for an insulated steel or fiberglass model triggers the same ripple. The thicker core and heavy-duty deadbolt send a clear signal to anyone casing the neighborhood, while the fresh paint or wood-grain finish immediately lifts the entire entryway—often the first thing guests and passersby notice. And because exterior doors are notorious for letting conditioned air escape, an insulated replacement seals that leak, keeping your living room comfortable and your power bill from creeping up during heat waves or cold snaps.
FAQ
It runs entirely on sunlight, so it doesn't add to your electricity bill or carbon footprint. The best models pair high-efficiency panels with durable batteries to keep paths lit even after cloudy days.
Look for a model with adjustable brightness modes and a wide beam angle. Also check the battery capacity in milliamp-hours—higher numbers mean longer runtime, which matters for areas that need light until dawn.
Not at all. Most come with a simple pole mount or wall bracket and no wiring. You just need a spot that gets direct sun for most of the day, and the light can be up in under an hour with basic tools.
Quality units are built with IP65 or higher waterproof ratings and rust-resistant aluminum frames. They're designed to keep working through storms, though it's wise to clear snow off the panel occasionally.
Very little. A quick wipe of the panel every few months prevents dust buildup from reducing charge efficiency. The LED bulbs often last 50,000 hours or more, so replacements are rare.
Yes, modern ones with 2000+ lumens and motion sensors can flood an area with light when needed. Many also have a dim-to-bright mode so they stay on all night but boost output when movement is detected.
No wiring, no electrician, and no ongoing energy costs. You might eventually replace the battery after 5-7 years, but that's typically the only expense beyond the initial purchase.
Conclusion
A growing number of homeowners are swapping grid-tied street lights for solar models after watching their utility bills and noticing how often traditional fixtures fail during storms. The real advantage shows up in everyday use: no trenching, no electrician, and light that keeps working when the grid goes down. But choosing the best solar street light means ignoring glossy spec sheets—look past the wattage claims and check whether the panel can actually refill the battery in your region's short winter days, not just under ideal lab conditions. Motion sensors and dimming schedules often matter more than raw brightness, because a light that runs at full blast all night wastes stored energy, while a fixture that brightens only when someone walks past can last for days on a single charge.
Weatherproofing is where many cheaper units fall apart, especially in coastal humidity or desert heat that corrodes connectors and degrades plastic housings. Buyers who skip this detail often find themselves replacing fixtures after one season. Installation is another quiet trap: you need a spot with real sun exposure, not just a convenient pole location, and the angle matters more than most guides admit. When those pieces come together, the payoff reaches beyond your own driveway—safer sidewalks, a cleaner curb appeal, and power bills that finally stop climbing. The best solar street light isn't the one with the most specs; it's the one that survives your actual weather, adapts to real movement patterns, and keeps running without you thinking about it.
Contact Us
Contact Person: kitty
Email: [email protected]
Tel/WhatsApp: +8618676039824
Website: https://www.srssolargroup.com/