

OEM Lip Gloss Tube: A Complete Guide for Custom Cosmetic Packaging
2026-08-30
When your lip gloss formula is ready to step into the spotlight, the tube it lives in says everything before a single swipe. Off-the-shelf packaging rarely captures the texture, finish, and mood your brand promises. That’s where custom OEM lip gloss tubes come in—giving you control over shape, surface, applicator, and finish so the product feels unmistakably yours. In this guide, we break down materials, capacity options, decoration techniques, and minimum order practicalities—without the fluff. Sanrong Packaging specializes in turning these choices into production-ready tubes that actually arrive on spec. Whether you’re launching a first shade or refreshing a full line, here’s how to avoid the costly mismatches most brands only discover after sampling.
The Real Cost of Custom Lip Gloss Tubes—And Where to Save
Most people assume the tube itself is the expensive part of custom lip gloss packaging, but that's rarely where the money goes. Tooling and setup charges for a brand-new mold can easily run into thousands of dollars, and if you tweak the design later, you're paying for another mold. On top of that, low minimum order quantities push the per-unit price up sharply because the factory still has to stop a production line, clean the machines, and mix a small batch of your custom color or finish.
The smartest savings come from compromising on the parts customers never notice. Instead of paying for a completely unique tube shape, pick an existing mold from your supplier's catalog and change only the color, cap, or outer printing. You can also skip the hot stamping and go with a single-color silk screen, or use a standard inner plug instead of a custom one. These choices keep the look distinct without the upfront engineering bill.
Shipping and sampling are the silent budget killers. Every round of pre-production samples costs money to make and then air-freight to you, often because of a tiny tweak to the label artwork. Ask your supplier to bundle two rounds of samples into the quote and be willing to accept sea freight for the final order. That alone can trim 15 to 20 percent off the total landed cost, which matters a lot more than saving a few cents on the tube itself.
Choosing a Tube Shape That Feels as Good as It Looks
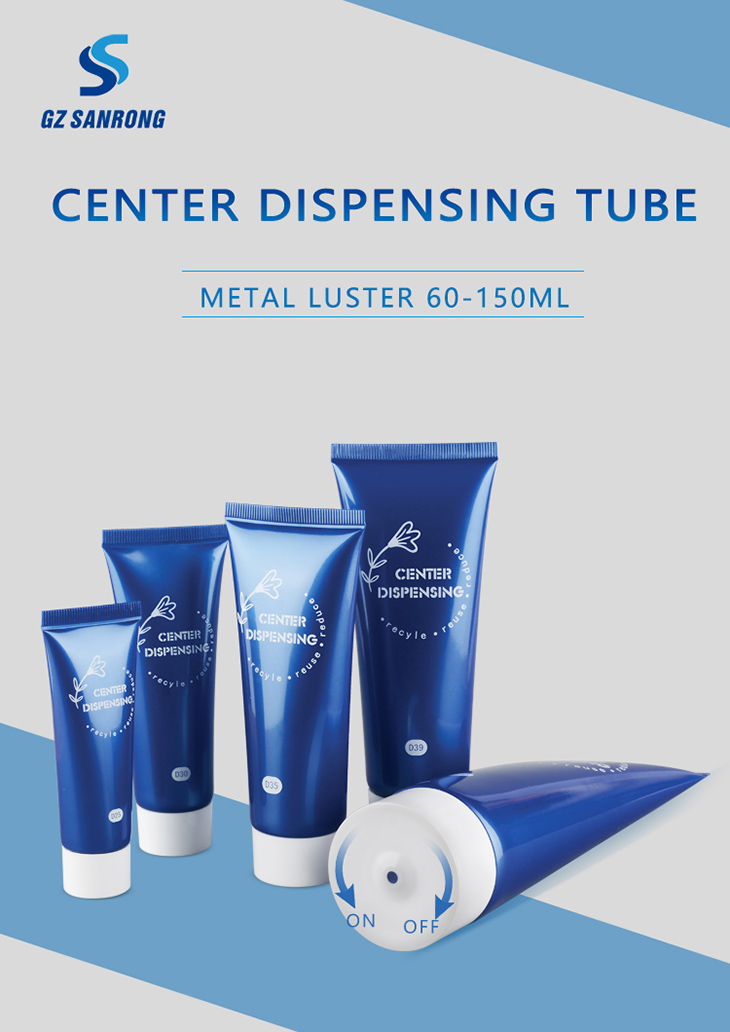
Most people pick a tube for how it sits on a shelf. That's a mistake. The shape you choose changes how your fingers settle around it, how the product comes out, and whether you actually enjoy reaching for it every morning. A slight inward curve near the middle can make a full-size tube feel lighter in the hand, while a flatter profile keeps it from rolling off a crowded counter.
Think about the moment of use. If the tube is too wide, you end up gripping with your whole palm and squeezing harder than you should. If it's too slim, it slips. The best shapes give your thumb and index finger a natural resting point, so the pressure feels even and the flow stays controlled. Matte coatings and soft-touch finishes can also change the hand feel more than the actual geometry does.
That doesn't mean you have to sacrifice the look. A sculpted silhouette with a rounded base can read as modern without being fussy, and it photographs well from any angle. But if it doesn't sit comfortably in your hand after five or six uses, the design isn't working. Try holding it with your eyes closed. If your grip stays relaxed and the tube stays put, you've found a shape that carries its weight as well as its appearance.
Material Swaps That Instantly Upgrade Your Packaging
Replacing standard poly mailers with textured, mineral-filled paper alternatives changes the entire unboxing feel before the box is even opened. That subtle grain under the fingertips and the quieter tear of a serrated edge signal care in a way glossy plastic never can. It also removes the static cling that makes tissue paper bunch and wrinkle, so inner wraps lay flat without extra fuss.
Another quick win is swapping injection-molded inserts for die-cut corrugate or molded fiber trays. The shift from hard plastic cradles to soft-touch, curbside-recyclable forms eliminates rattling and gives products a more intentional resting place. For food and beauty items, trading foam peanuts for starch-based fill or wool offcuts adds a tactile surprise that matches the product’s shelf presence instead of fighting it.
What Your Manufacturer Won't Tell You About Minimum Orders
Most factories won't admit that a minimum order quantity is less about your needs and more about protecting their own margins. The number often reflects the point where setup costs, material waste, and machine downtime finally become worth their while. If you accept a lower MOQ, you're usually absorbing those expenses through higher per-unit pricing—but they'll frame it as a "small batch premium" instead of telling you the real math.
Another quiet truth is that the printed MOQ is rarely a hard wall. Plenty of suppliers will bend if you ask about shared production runs, offer to pay upfront, or agree to a longer lead time so they can slot your order into an existing schedule. Even asking "What would it take to get half that quantity?" can unlock options they never mention on a quote sheet.
Finally, watch out for hidden MOQ games. Some manufacturers quote a low minimum to win your business, then force you to buy packaging, labels, or components in bulk—effectively raising your real order floor. Others will quietly substitute materials or delay delivery on small runs, knowing you're less likely to push back when you're not a priority customer. Get every cost and condition in writing before you commit.
Designing the Applicator: A Small Detail With Huge Impact
Every millimeter of an applicator shapes how a product feels in the hand, how precisely it dispenses, and whether the user reaches for it again. A slightly textured grip can prevent slipping during use, while a contoured tip can direct flow exactly where it is needed without waste or mess. These choices are rarely noticed when done well, yet they quietly determine comfort, control, and confidence.
The material itself carries much of the responsibility. A flexible neck allows for adjustment in tight spaces, while a firmer body provides the stability needed for consistent application. Even the weight of the applicator influences fatigue during repeated use, especially in professional settings where hundreds of applications happen in a single shift. Designing for this reality means testing prototypes not just for visual appeal, but for the subtle ways they respond to pressure, angle, and repeated motion.
Small changes in geometry can lead to dramatic differences in outcome. A slightly wider opening may reduce clogging, while a tapered edge can prevent product from pooling where it should not. The most effective applicators are not simply functional; they feel intuitive from the first use, as if the hand already knows how to hold them. That sense of natural fit is the result of deliberate iteration and attention to details that many would overlook.
From Prototype to Production: How the Timeline Actually Works
The assumption that a prototype moves straight into production like items on a factory belt rarely matches reality. Instead, the timeline loops back on itself: a prototype gets built, tested with a handful of users, torn apart, and rebuilt with only the parts that proved useful. That back-and-forth usually takes longer than the initial build, yet it's where the product actually finds its shape.
What surprises most teams is the hardening phase after the prototype survives internal demos. Production code needs input validation for edge cases nobody thought about, permission checks on every endpoint, rate limiting, log redaction, and a rollback plan that doesn't require the person who wrote the feature to be awake. This work can quietly double the original estimate, not because the feature is wrong, but because the prototype was never meant to face the open internet.
A practical way to shorten the timeline without cutting corners is to ship behind feature flags or a canary release. Instead of waiting for the entire prototype to become production-perfect, you let a small slice of real traffic interact with the rough edges while monitoring the metrics that matter. That feedback loop keeps the timeline honest: you spend time hardening only what users actually touch, not what you imagined they would.
FAQ
Think about the formula's viscosity and how the applicator needs to perform. Polypropylene offers a soft, squeezable feel, while PET gives a clearer, more rigid finish. For thicker glosses, you might want a tube with a wider opening and a doe-foot wand that won't bend too easily.
Silkscreen printing works well for simple logos and flat colors, while hot stamping adds a metallic or holographic shine. For full coverage or complex artwork, opt for labeling or in-mold labeling. Some suppliers also offer gradient spraying or soft-touch coatings to change the hand feel.
Many OEM factories allow lower minimums on stock tube shapes, but once you introduce custom colors, unique molds, or specialized decoration, the MOQ can jump. Ask if they keep a range of ready-to-customize blanks in their warehouse.
A standard run with existing molds and simple decoration might ship in 20 to 30 days. If you need a new mold or complex multi-step finishing, allow 45 to 60 days. Always confirm the timeline before paying a deposit, and add buffer for shipping delays.
Test the cap seal by squeezing the tube with the cap on. Open and close it at least twenty times to check the threads. Look at the decoration under natural light for any smudging or misalignment. Also fill it with your actual gloss to see if the applicator picks up the right amount of product.
Yes, you can choose post-consumer recycled PET or polypropylene, or switch to a refillable design with a replaceable inner cartridge. Some manufacturers offer tubes made from sugarcane-based bio-plastics. Just be sure to ask for third-party certifications instead of taking a supplier's word.
Focus on details like a heavier cap, a matte soft-touch finish, and a custom applicator shape. Small touches—such as a metallic band at the neck or a subtle embossed logo on the shoulder—make the product feel curated without driving up cost too much.
Conclusion
Most brands walk into OEM lip gloss tube sourcing expecting a quick quote and walk out with a spreadsheet full of line items they never saw coming. Tooling fees, plate charges, cap liners, color matching—these aren't extras; they're the actual price of doing custom work. The smart way to trim costs isn't cutting corners on the tube itself. It's asking your supplier where the real money goes. Often you can keep a standard inner body and spend your budget on a custom outer cap or a soft-touch finish, which reads as far more premium than a fully bespoke shape that doubles your mold investment. And if a manufacturer insists a 10,000-piece minimum is non-negotiable, find another one. Plenty of smaller factories will run 3,000 or 5,000 units, especially if you're flexible on lead time or willing to pay a small per-unit surcharge. Ask for a breakdown of setup versus per-piece pricing—that's where the hidden savings live.
Beyond the numbers, your choices in shape, material, and applicator decide whether the tube feels like a drugstore impulse buy or a high-end staple. A soft-touch matte body or a post-consumer recycled resin can shift perception instantly without changing your logo or label. The applicator deserves more attention than most brands give it: a doe-foot wand with the right flex and flocking density affects how product deposits, how full the tube feels in hand, and how often people reach for it. Finally, don't trust a timeline that skips from PDF to production in two weeks. Realistic prototyping takes three to six weeks, including a physical sample, filling test, and at least one round of adjustments. If your supplier won't show you a sample before bulk production, walk away. The best OEM partnerships treat the pre-production phase as a design loop, not a box to tick.
Contact Us
Contact Person: Alex Wu
Email: [email protected]
Tel/WhatsApp: 86-20-37965868
Website: https://www.gzsanrong.com/en.html